Email [email protected] Call Now! +44(0)1689 602 248

I wasted a lot of money on gear I didn’t need.
This guide will help you avoid that, and get set up the right way from day one.
Because creating great video isn’t about having everything. It’s about having the right things.
This is the gear list I wish I had when I first picked up a camera. It’ll save you time. Cut the guesswork. And help you shoot video that actually looks professional.
The best part? You don’t need to buy it all at once.
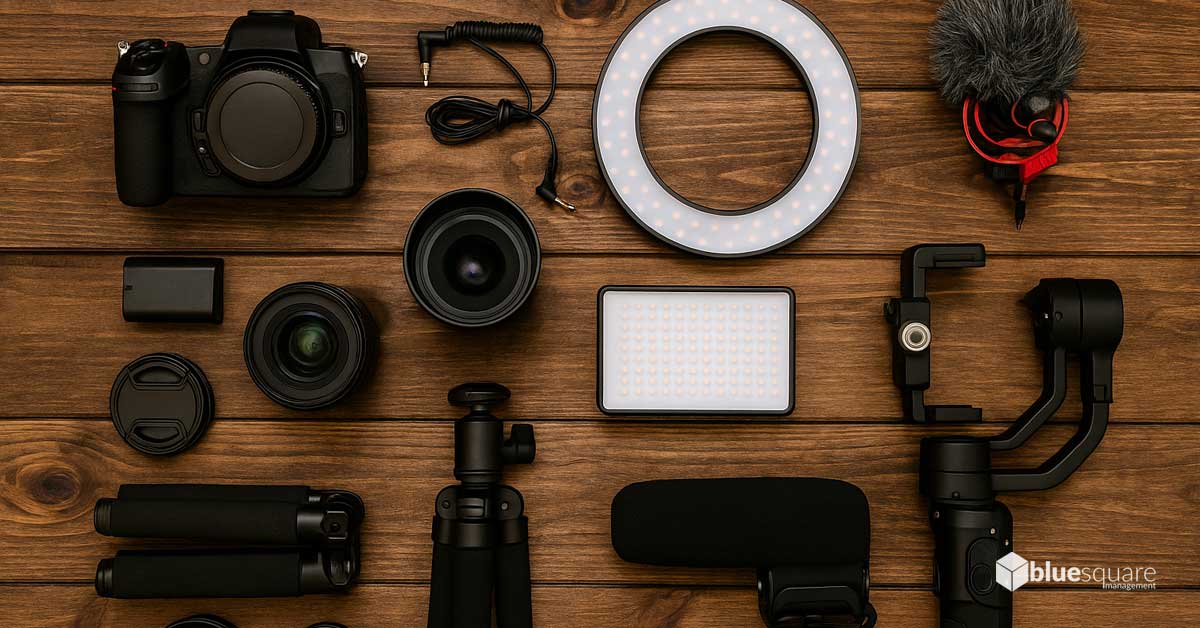
Let’s be honest, getting from idea to finished video takes more than just creativity. You need the right gear too. But with so many cameras, mics, lights, and accessories out there, it’s easy to feel overwhelmed.
I’ve been there. I remember googling “best mic for YouTube” and falling down a rabbit hole of specs I didn’t understand.
That’s why I wrote this guide.
Here’s what you’ll find:
Whether you’re filming on your phone or investing in your first mirrorless setup, this guide is built to help you move with confidence, not confusion.
Let’s build your setup, piece by piece.

You don’t need the best camera. You need the right video production equipment for you.
What kind of equipment do you need to start filming? Here’s how to figure that out.
Different videos need different gear. Obvious, right? But it’s where most people trip up.
No one setup fits all. Nail down your use case first. Everything else comes from that.
A good kit costs more than just the camera. You’ll likely need:
So here’s the move: Start with a core video equipment setup that fits your current budget, and build from there.
Example: Put more of your money into a solid camera body and mic. You can upgrade lenses or lighting later.
I did it this way, and it saved me from spending on stuff I didn’t use.
If you’re new to video, don’t start with something that takes a degree to operate. You’ll get stuck. Frustrated. And maybe stop altogether.
Start with gear that helps you learn while you shoot. Something that:
But if you’re the kind of person who loves settings and dials? Get something that gives you room to experiment.
Either way, choose gear that works for where you are now, not where you hope to be next year. Because good video shooting isn’t about having the most gear, it’s about knowing how to use what you have.
Bottom line? The right video gear isn’t about flexing the latest kit. It’s about matching your camera to your content, your budget, and your current level.
That’s how you buy smart. And shoot better.
Cameras are where most people blow their budget. They think more megapixels = better videos. Not true.
The best camera is the one that fits how you shoot, and what you’re shooting. Even a basic camera can deliver great results when matched to your content and skill level. You don’t need a professional camera, you need the right tool for your style, skills, and goals.
Here’s how to pick the right one without getting buried in specs.
Here’s what actually matters, and what it means in plain English.
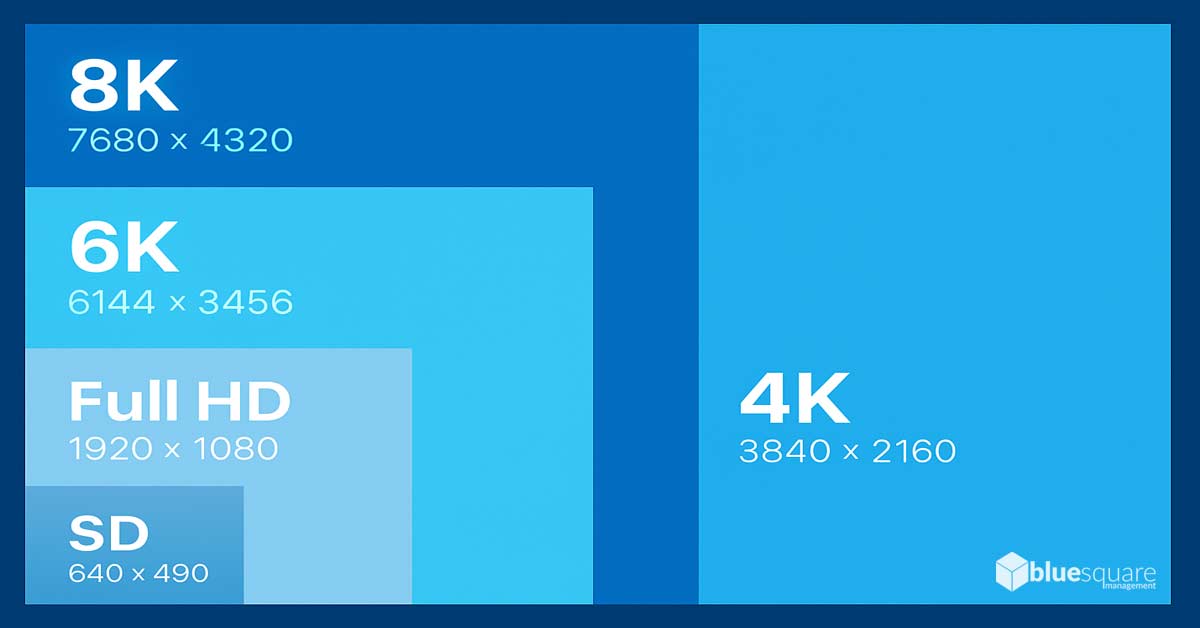
If you’re just getting started? 1080p is totally fine. You won’t need 6K or 8K unless you’re doing high-end commercial or film work, and your workflow can handle it.
Most cameras can handle 30fps and 60fps. You don’t need more than that (yet).
Think of the sensor like your camera’s “eye.” Bigger sensors see better in low light and give that nice blurry background look.
Tip: APS-C is a solid starting point for most beginners.
You want a camera that keeps you in focus, especially if you’re filming yourself.
Look for features like:
If you’re shooting solo, this is your best friend.
Shaky footage = amateur vibes. Stabilisation helps fix that.
Even basic stabilisation can make a big difference, especially if you’re filming handheld.
Built-in mics suck. You want a 3.5mm mic input at minimum so you can plug in an external mic.
Some cameras have pro XLR options, but 3.5mm is enough to start.
If you’re filming yourself, this is non-negotiable. You need to see what you’re shooting.
| Camera Type | Brief Description | Pros | Cons | Best For (Use Cases) | Key Video Features to Look For |
|---|---|---|---|---|---|
| Smartphones | Mobile phones with increasingly capable cameras. | Already owned by most, ultra-portable, very easy to use, good for quick social media content, improving video quality. | Smaller sensors (poorer in low light), limited true manual control, often weaker audio, battery drain, storage limitations. | Casual vlogging, social media updates, quick captures, when other cameras aren’t available. | Good primary camera sensor, 4K recording capability, effective image stabilisation, sufficient storage, compatibility with external microphones and dedicated camera apps. |
| Action Cameras | Small, rugged, waterproof cameras designed for capturing action and POV shots. | Durable, waterproof, compact, wide field of view, excellent built-in stabilisation, versatile mounting options. | Small sensors (can struggle in low light), fixed wide lens (can cause distortion, less versatile for all shot types), audio often needs improvement with external mics. | Sports, adventures, travel in harsh conditions, point-of-view (POV) shots, unique angles, underwater footage. | Robust stabilisation (e.g., GoPro HyperSmooth), 4K resolution at various frame rates, waterproofing depth, battery life, available mounts and accessories. |
| Camcorders | Dedicated video cameras, often with built-in zoom lenses and ergonomic designs. | Designed specifically for video, comfortable for long recordings, good optical zoom ranges, often good built-in audio, long battery life, simple operation for events. | Can be perceived as less “cinematic” than DSLR/mirrorless, sensor sizes often smaller, fixed lens limits creative flexibility (on most consumer models). | Event coverage (weddings, conferences), family videos, documentaries, situations requiring long record times and significant zoom. | Optical zoom range, image stabilisation quality, audio input options (3.5mm mic jack, headphone jack), recording formats, battery life, ease of use. |
| DSLR | Digital Single-Lens Reflex cameras, traditionally for stills but with video features. | Mature lens ecosystem (many affordable used options), often good battery life for stills (less so for continuous video), optical viewfinder (less relevant for video). | Bulkier than mirrorless, mirror mechanism means viewfinder blacks out during video recording, video autofocus often slower/less reliable than mirrorless, manufacturers shifting focus to mirrorless. | Hybrid photo/video work, budget-conscious entry to interchangeable lens systems (especially via used market). | Sensor size (APS-C, Full-Frame), resolution and frame rate options (1080p, 4K), video autofocus performance (e.g., Canon’s Dual Pixel AF), microphone input, flip-out screen. |
| Mirrorless Cameras | Interchangeable lens cameras without a mirror mechanism, offering a direct sensor view. | More compact and lighter than a DSLR, generally excellent video autofocus, electronic viewfinder (EVF shows exposure preview), often better dedicated video features (higher frame rates, log profiles), in-body image stabilisation (IBIS) common, represents the latest technology. | Can have shorter battery life than DSLRs (due to EVF/sensor always being active), lens ecosystem might be newer/pricier for some mounts, though rapidly expanding. | Vlogging, YouTube content, independent filmmaking, travel videography, hybrid photo/video work where video is a priority. | Sensor size, resolution/frame rate options (4K common), excellent autofocus with tracking, IBIS, microphone and headphone jacks, flip-out screen, log recording options for advanced users. |
You might also hear about something called a cinema camera, these are built for high-end film production with full crews and big budgets. If you’re just starting out, they’re overkill.
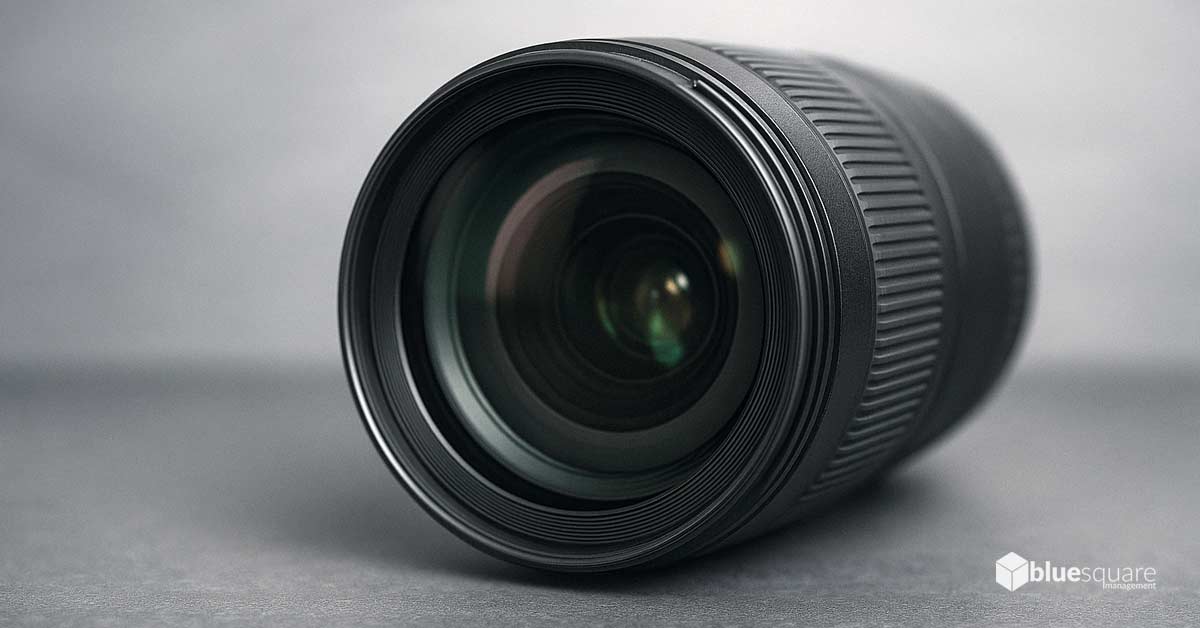
Your camera’s only half the story. The lens is what really shapes how your video looks.
Wide or tight? Blurry background or sharp all over? Bright in low light or noisy and flat? That’s all about the lens.
Let’s break it down without the geek-speak.
This tells you how “zoomed in” your lens is.
Most beginners start with a kit lens—something like 18–55mm. It covers a bit of everything.
A fancy way of saying how much light your lens lets in.
Want your subject sharp and the background soft? Go for something like f/1.8 or f/2.8.
| Lens Type | What It Is | Pros | Cons | Best For |
|---|---|---|---|---|
| Kit Lenses | The basic zoom lens that usually comes with your camera (e.g. 18–55mm) | Cheap, flexible, covers wide to short telephoto. | Not great in low light, variable aperture. | Learning the ropes, general shooting. |
| Prime Lenses | Fixed focal length (like 35mm or 50mm). No zoom. | Great in low light, beautiful background blur, often sharper. | You have to move your feet—no zoom. | Portraits, interviews, low-light shooting. |
| Zoom Lenses | Adjustable focal range (e.g. 24–70mm, 70–200mm). | Very flexible, no need to switch lenses. | Can be bulky, fast zooms (f/2.8) can get pricey. | Events, travel, fast-paced shoots. |
Here’s the thing: cameras and lenses have mounts. Each brand usually has its own type.
If you’re new, stick with native camera lenses that are made for your camera model. Fewer headaches.
Want to upgrade from the kit lens? Start here:
Bottom line? Your lens controls the feel of your footage. Choose one that fits your style, and your space.
You can have perfect visuals. Beautiful lighting. A killer story. But if your sound is bad? People won’t stick around.
Truth is, bad audio drives viewers away faster than shaky footage or average lighting. But the good news? Fixing it doesn’t need to cost a fortune.
Here’s what you need to know.
Most camera microphones are an afterthought. Tinny. Echoey. Picks up everything.
What you want is:
Let’s break it down.
| Mic Type | Description | Pros | Cons | Best For (Use Cases) | Typical Connection |
|---|---|---|---|---|---|
| On-Camera (Shotgun) Microphones | Mounts directly to your camera. Records what’s in front of it. | Easy to use, a big upgrade over built-in audio, good for general shooting. | Picks up noise if you’re far from the subject, can hear camera handling, needs a windscreen outdoors. | Vlogging, events, basic interviews, solo shooting. | 3.5mm TRS to mic input |
| Lavalier / Lapel Mics (Wired & Wireless) | Clips to clothing. Picks up voice clearly from the source. | Hands-free, consistent audio, wireless = freedom to move. | Wires can get messy, wireless may cut out, can pick up clothing rustle. | Interviews, presentations, on-camera tutorials. | 3.5mm TRS, or wireless receiver to camera/smartphone |
| USB Microphones | Plugs into your computer. Great for voice work. | Plug-and-play, clear audio for the price, great for studio-style recording. | Not for field recording or camera use. Needs a computer. | Voiceovers, podcasts, Zoom/Teams, tutorial narration. | USB to computer |
| Handheld Microphones | Think reporter-style. You hold it or put it on a stand. | Durable, good in noisy spots, great vocal clarity. | Not discreet, must be held or mounted. | Street interviews, live events, studio setups. | XLR, 3.5mm, or USB depending on model |
Recording with your phone? You can still plug in:
Just make sure you test the connection first. Some phones need specific adapters.
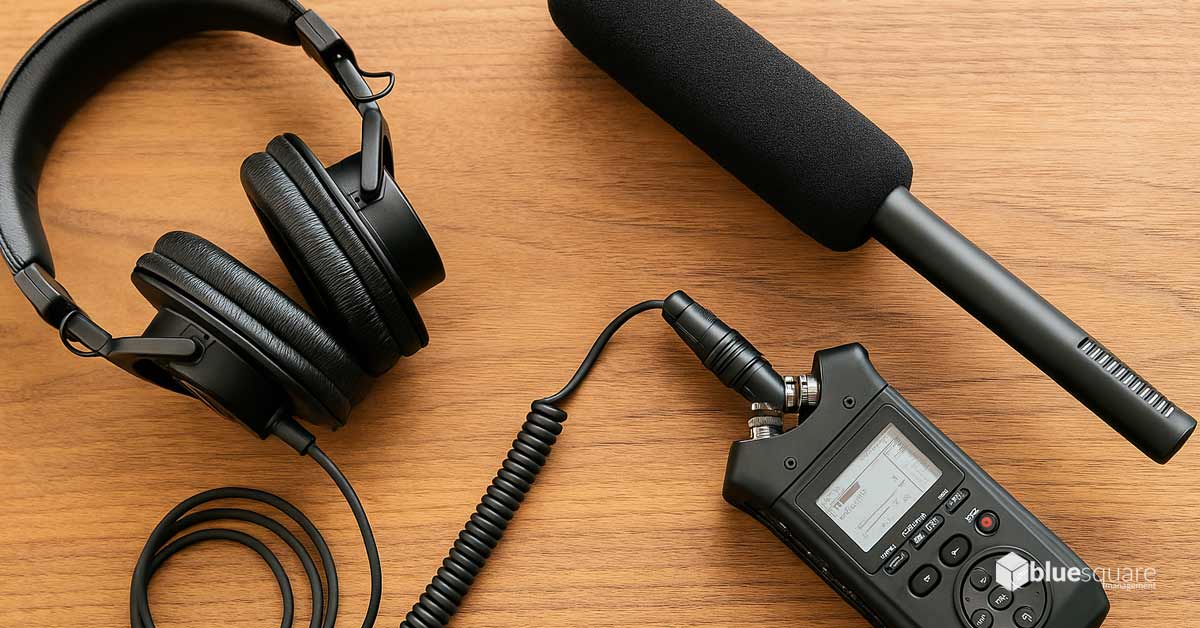
An external audio recorder (like one from Zoom or Tascam) gives you:
The only catch? You’ll have to sync the audio and video in editing. But it’s worth it if you want that crisp, pro sound.
A boom pole lets you get the mic super close to your subject, just out of frame.
It’s often used with shotgun mics and helps avoid:
Even a cheap camera or a boom pole setup can massively improve your audio quality.
Bottom line? Crisp audio isn’t a bonus. It’s a must. And you don’t need a studio to get it right, you just need to care enough to mic it properly.
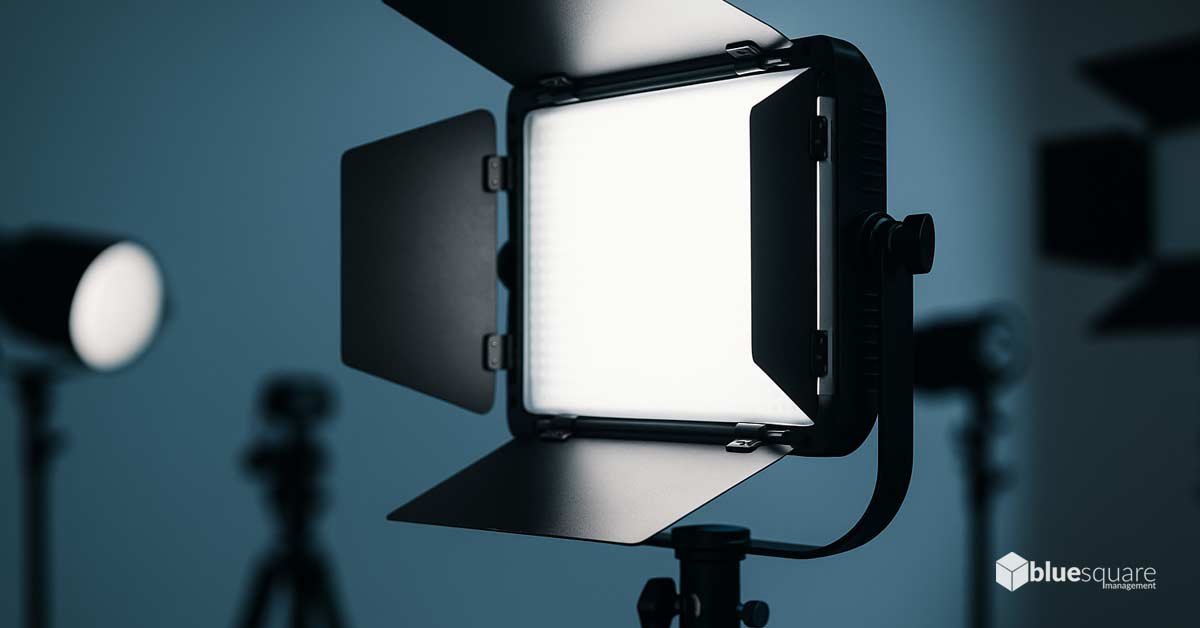
Lighting is what takes your video from meh to wow. You can have a top-end camera, but if your lighting’s off? It’ll still look amateur.
The good news? Even basic lighting can make a huge difference.
Let’s walk through what you need, and what actually works.
The best part? You don’t need a huge setup to get started.
Here’s a breakdown of the most common beginner-friendly lighting options.
| Light Type / Modifier | Description | Pros | Cons | Best For (Use Cases) | Key Characteristics |
|---|---|---|---|---|---|
| Natural Light (Sunlight) | The sun, used directly or through a window. | Free, beautiful, soft (during golden hours). | Can change quickly, hard to control, harsh at midday. | Shoots near windows, outdoors, no-budget setups. | Best early morning or late afternoon. Diffuse with sheer curtains. |
| LED Panels | Flat panels with small lights inside. | Dimmable, colour-adjustable, energy-efficient, portable. | Can be harsh without diffusion, colour accuracy varies. | Key/fill/back lights, location shoots, travel-friendly kits. | Check brightness (lumens/lux), CRI rating (colour accuracy), power source. |
| Softboxes (Modifier) | Diffuses and softens light from a source. | Soft, flattering light. Great for faces. | Bulky, needs its own light source. | Portraits, interviews, product shots. | Larger = softer light. Watch for build quality and diffuser materials. |
| Ring Lights | Circular light, camera sits in the middle. | Even, shadowless light. Easy setup. | Can look flat or unnatural. Not ideal for everything. | Makeup, vlogging, talking head videos. | Ring size, brightness control, phone/camera mounts. |
| Reflectors (Modifier) | Bounces existing light back onto your subject. | Cheap, no power needed, very effective. | Needs a light source to work, often needs a stand or helper. | Filling shadows, softening contrast, working with natural light. | Comes in white, silver, gold, black, and translucent. Each gives a different effect. |
You don’t need a full studio. Just think about:
You’ve probably heard this before. But here’s what it actually means:
You don’t need 3 lights to do this. One light + a reflector + a desk lamp behind the subject = solid beginner setup.
Even a £60–£100 LED lighting equipment kit, or a basic camera light if you’re just getting started, can completely change your setup. It’s one of the best early upgrades you can make.
Bottom line? Lighting is less about what you buy, and more about what you do with it.
Learn how to shape and soften it. And your footage will instantly feel more professional, even with a simple setup.
Nothing screams “amateur” like a wobbly video. Even great lighting and sound can’t save it if your footage makes people feel seasick.
But here’s the good news: You don’t need expensive gear to get smooth shots. You just need the right tools, and a few tricks.
Whether you’re filming interviews, product shots, or handheld b-roll, stability is everything.
Let’s break down your main options, and when to use them.
Every videographer needs one. Period. A good tripod locks your camera in place. It’s an essential piece of equipment for:
Here’s what to look for:
Tip: Always choose a tripod with a fluid head if you want your movement to feel cinematic.
A monopod is a one-legged stand. It gives you some stability without slowing you down.
Great for:
Pros: More mobile than a tripod. Helps reduce fatigue when using a heavier camera.
Cons: It won’t stand on its own, you’ll still need to support it.
Some video monopods have small folding feet and a fluid base to give extra movement control. Worth looking into.
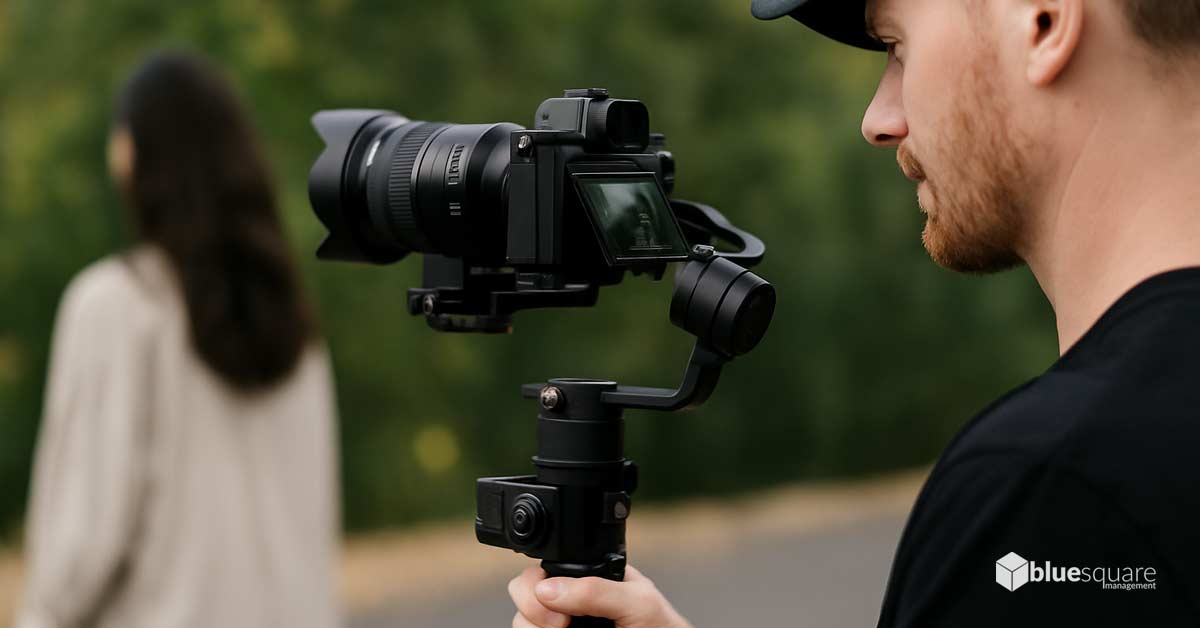
If you want buttery-smooth movement, this is the tool.
A gimbal uses motors and sensors to cancel out your shakes. It’s perfect for:
Pros: Super smooth footage, even when you’re moving.
Cons: Takes practice. Adds weight. And it’s an investment.
If your content needs lots of dynamic camera movement, and you’ve got the budget, a gimbal’s worth
You don’t always need gear to shoot steady footage. Try these:
Bonus: If your camera or lens has stabilisation, turn it on. It really helps.
Bottom line? Stable video makes your content easier to watch, and easier to trust.
You don’t need to spend a fortune. You just need to stop shaking and start shooting smarter.
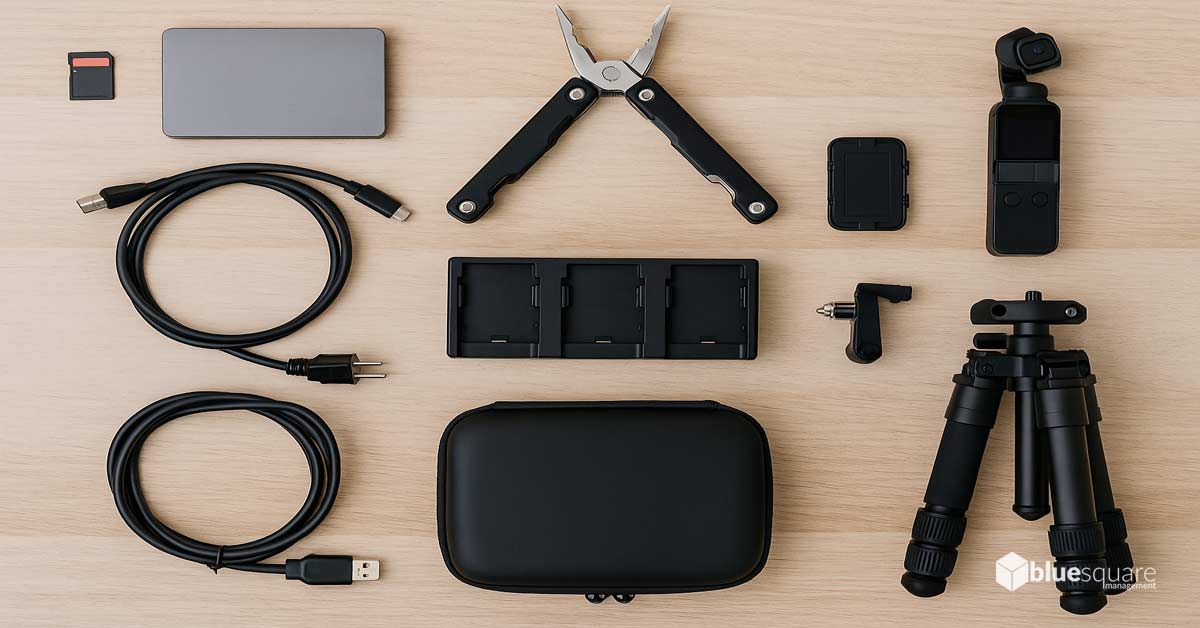
Let’s be honest, camera, mic, and lights get all the attention. But it’s the little things that keep your shoot running smoothly.
The truth? Accessories are what save your shoot when things go wrong. Here’s what you need in your bag from day one.
Your video footage lives here. Pick the wrong card, and your camera might just stop recording mid-shot. Not fun.
Here’s what you need to know:
These are the top-tier memory cards—blazing fast, huge capacity.
Unless your camera specifically uses CFexpress, you can skip this. But if you’re using a pro-level camera? You’ll need them.
You will run out of battery. Always. Usually mid-shot.
Here’s what to do:
And yes, third-party batteries can work fine, just check reviews and avoid sketchy brands.
You’ve spent all this money on gear. Protect it.
Types of bags:
Look for:
Don’t skimp here. A good bag can save your gear and your back.
Here’s the stuff people forget, but always need. Think of it as your “don’t-get-caught-out” checklist.
Video files are huge. You’ll need fast, reliable storage.
Tip: Always back up your footage in at least two places.
Bottom line? The small stuff might not be sexy, but it’s what keeps your shoot from falling apart.
Pack smart. Bring extras. And always, always carry gaffer tape.
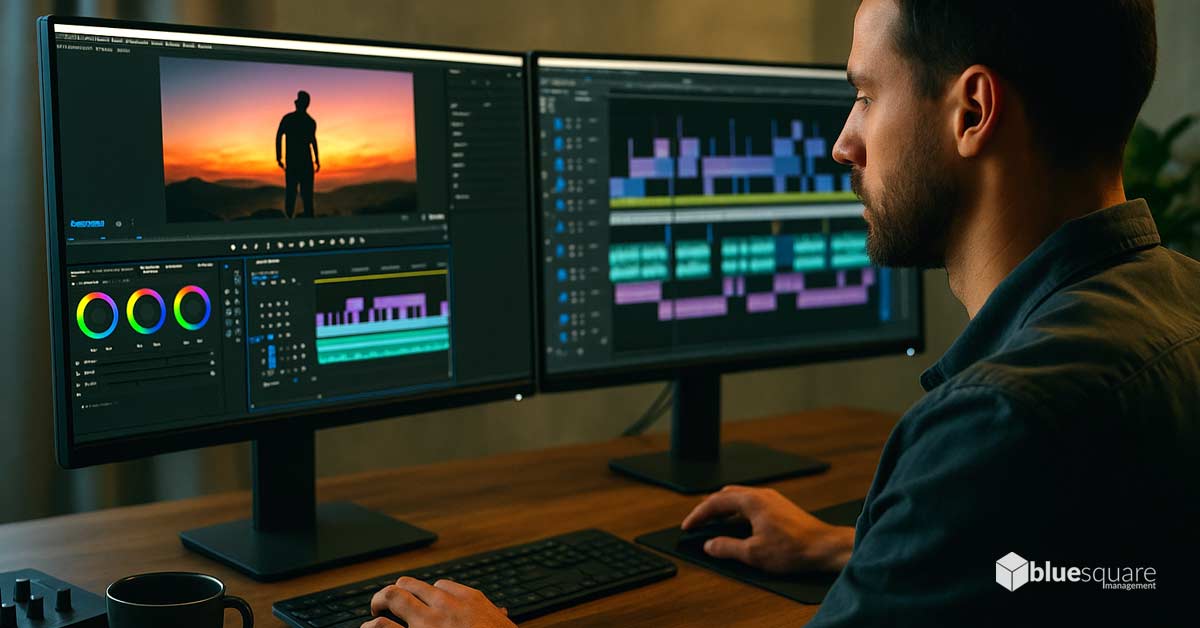
Filming is just half the job. But editing? That’s where the video production process really comes together and your raw clips become something people want to watch. This is where video editing brings everything together, cutting out the boring bits, adding music, fixing mistakes, and shaping your final story.
If you’re new to post-production, don’t worry. You don’t need to become a film editor overnight. Let’s keep it simple.
There’s a lot of video editing software out there. But here’s what actually matters:
If you’re planning on live streaming, some tools like OBS Studio or Streamlabs are built just for that. They let you broadcast directly to platforms like YouTube, Facebook, or Twitch, with full control over scenes, overlays, and audio.
Tip: If you’re just trimming clips and adding text or music, start with Clipchamp or iMovie.
All of them offer free trials, so test before you invest.
You don’t need fancy effects or Hollywood transitions. Clean, clear edits always win, no need to get overwhelmed by production software that tries to do everything at once.
If you’re editing 4K and your laptop sounds like it’s about to take off… you’re not alone.
Here’s what helps:
If your computer struggles with 4K, consider shooting in 1080p until you’re ready to upgrade.
Your footage is gold. Don’t lose it.
And yes, name your files properly. “Untitled Project 47” will come back to haunt you.
Bottom line? Post-production is where your footage becomes a story. Keep it simple. Stay organised. And don’t be afraid to hit Undo.
Want a ready-to-go version of everything we’ve covered so far? I’ve put together a free, printable checklist with all the essentials, from cameras and mics to lighting, accessories, and post-production tools.
Use it to plan your gear, track what you’ve already got, and avoid overbuying.
Buying gear piece by piece can feel like a jigsaw puzzle, without the picture on the box.
So let’s make it easy.
Below are real-world beginner kits tailored to different goals, budgets, and experience levels, an easy-to-follow equipment checklist you can use or tweak to fit your needs. You can use them as-is or tweak them based on what you’re shooting.
| Kit Type / Goal | Camera Suggestion (Type/Example) | Lens Suggestion | Audio Suggestion | Lighting Suggestion | Stability Suggestion | Approx. Budget Range (£) |
|---|---|---|---|---|---|---|
| The Ultra-Budget Smartphone Vlogger Kit | Your current smartphone (e.g., iPhone, Galaxy, Pixel) | Native smartphone lenses | Wired lav mic with TRRS adapter, or smartphone shotgun mic | Natural light (window), small battery-powered LED | Handheld grip or mini smartphone tripod | £50–£150 |
| The Dedicated Vlogger / YouTuber Starter Kit | Mirrorless (Sony ZV-E10, Canon EOS R50, Nikon Z30) | Kit lens (16–50mm / 18–45mm) or 24mm/35mm prime | On-camera shotgun (Rode VideoMicro II) or wireless lav (DJI Mic, Rode Wireless GO II) | 1–2 LED panels with softboxes or a ring light | Travel tripod with basic fluid head or small gimbal | £500–£1200 |
| The Aspiring Short Filmmaker Basic Kit | Mirrorless with manual controls (Panasonic G7/GH used, Fujifilm X-T30 II, Blackmagic Pocket) | Prime lens (35mm or 50mm f/1.8), or vintage lens with adapter | External recorder (Zoom H1n/H4n Pro) + shotgun mic + boom pole | 2–3 LED panels with softboxes, reflectors | Heavy-duty tripod with fluid head | £800–£2000+ |
| The Small Business / Corporate Basic Kit | Camcorder (Sony FDR-AX43, Canon Legria G70) or easy mirrorless | Built-in zoom (camcorder) or flexible kit lens | Wired lav mic or good on-camera shotgun mic | 2-point LED lighting kit with softboxes | Stable tripod with fluid head | £600–£1500 |
Not sure what equipment needed to get started? These tips will help you build a smart setup without wasting money.
1. Start with the essential equipment: If your budget is tight, prioritise:
You can always upgrade later.
2. Consider used gear: Reputable sellers offer affordable options on cameras and lenses. Just make sure there’s a return policy.
3. Don’t buy everything at once: Figure out what you actually use, then invest further.
4. DIY where it makes sense:
5. Rent for special shoots: Need a cinema lens or high-end gimbal just once? Rent it. Save your cash.
Bottom line? Your first kit doesn’t need to be perfect. It just needs to work for you. Build it piece by piece. Learn as you go. Upgrade when it makes sense.

Got questions? Good. So did everyone else who ever picked up a camera. Here are the answers I wish someone had given me when I was starting out.
A smartphone, a quiet room, and good natural light. Seriously. That’s enough to get rolling.
Add a cheap lavalier mic (with an adapter) and you’re already ahead of most beginners.
Yes. Loads of successful YouTubers started with just a phone. Focus on:
Content matters more than camera specs.
Rough guide:
You don’t need to spend thousands. Buy what solves the problems you’re running into, and not what looks shiny.
1080p is easier to edit, smaller file sizes, and still looks great online. 4K gives you sharper detail and flexibility, but it’s heavy on your storage and computer.
Start with 1080p. Upgrade when your workflow can handle it.
Three big ones:
Both are great options, it depends on your comfort level.
Buy new if:
Buy used if:
Most of my early kit was used. Just do your homework and avoid shady sellers.
Better sound. Get a proper mic, and suddenly your video feels more polished, even if you’re still using a phone camera.
Ask yourself:
If the answer’s “yes” more than once, it might be time to level up.
Still unsure? Start with what you have. Create. Learn. Then spend money on things that fix real problems, not just because you saw them in a gear review.
You’ve made it to the end, which means you’re serious about creating better video.
Let’s keep it simple.
Remember, expensive equipment doesn’t make you a great creator. Practice, patience, and purpose do.
The gear you choose should match your goals, not someone else’s gear list.
So take what you’ve learned here, pick a setup that fits your budget and style, and hit record. Whether you’re filming for fun or building your brand, this guide is here to help video creators shoot with confidence.
How to Make a Shot List Like a Pro! Free Download Inside for Awesome Videos